

Early Photography – Cyanotypes
By: James DaMico, Curator of Audiovisual Collections
The Photography Department of Cincinnati Museum Center holds about 1 million photographic prints, negatives, slides, glass plate negatives, and cased images such as daguerreotypes.
This article is about early photography using examples from my personal collection.
Cyanotypes
On April 20, 2020 I had the pleasure of speaking with George Zahn who interviewed me for his Union Terminal Time show on WMKV 89.3FM radio. One of the questions George asked was about Cyanotypes and my abbreviated answer gave rise to not only making some Cyanotypes in my backyard but also expanding on this process and history in this blog.
The Cyanotype process, also known as blueprints, is a non-silver, non-gelatin process that was introduced by Sir John Herschel in 1842. Herschel’s process came out a few years after the introduction of Louis Jacques Mandé Daguerre’s Daguerreotype process of 1839.
Early field biologists such as Anna Atkins used Herschel’s process for indexing and documenting plant specimens. The Cyanotype process didn’t become popular until the 1880’s and this can be attributed to two technological advancements: the gelatin dry plate glass negative first offered for sale in 1879 and George Eastman’s introduction of flexible film that came on a roll, a Kodak camera first introduced in 1888 which came loaded with 100 exposures, the ease of having film developed by Kodak and great marketing that led to the rise in affordable photography for the masses.
Examples of Cyanotype contact prints from roll film can be found as standalone prints as well as being mounted in photo albums or scrapbooks. Photographers using gelatin dry plate negatives also made use of having the capability to contact print from a camera negative and more. The process was also used to copy drawings from original tracings, think architectural blueprints.
In a nutshell, the chemical formula is a combination of potassium ferricyanide and ammonium ferric citrate or some variation of it. The photographer/artist would coat a well sized piece of paper with the solution and allow the paper to dry. Next, he/she would place a negative on top of the paper secured with a piece of glass, expose the negative to light, in most cases the sun and finally wash in water until the water runs clear.
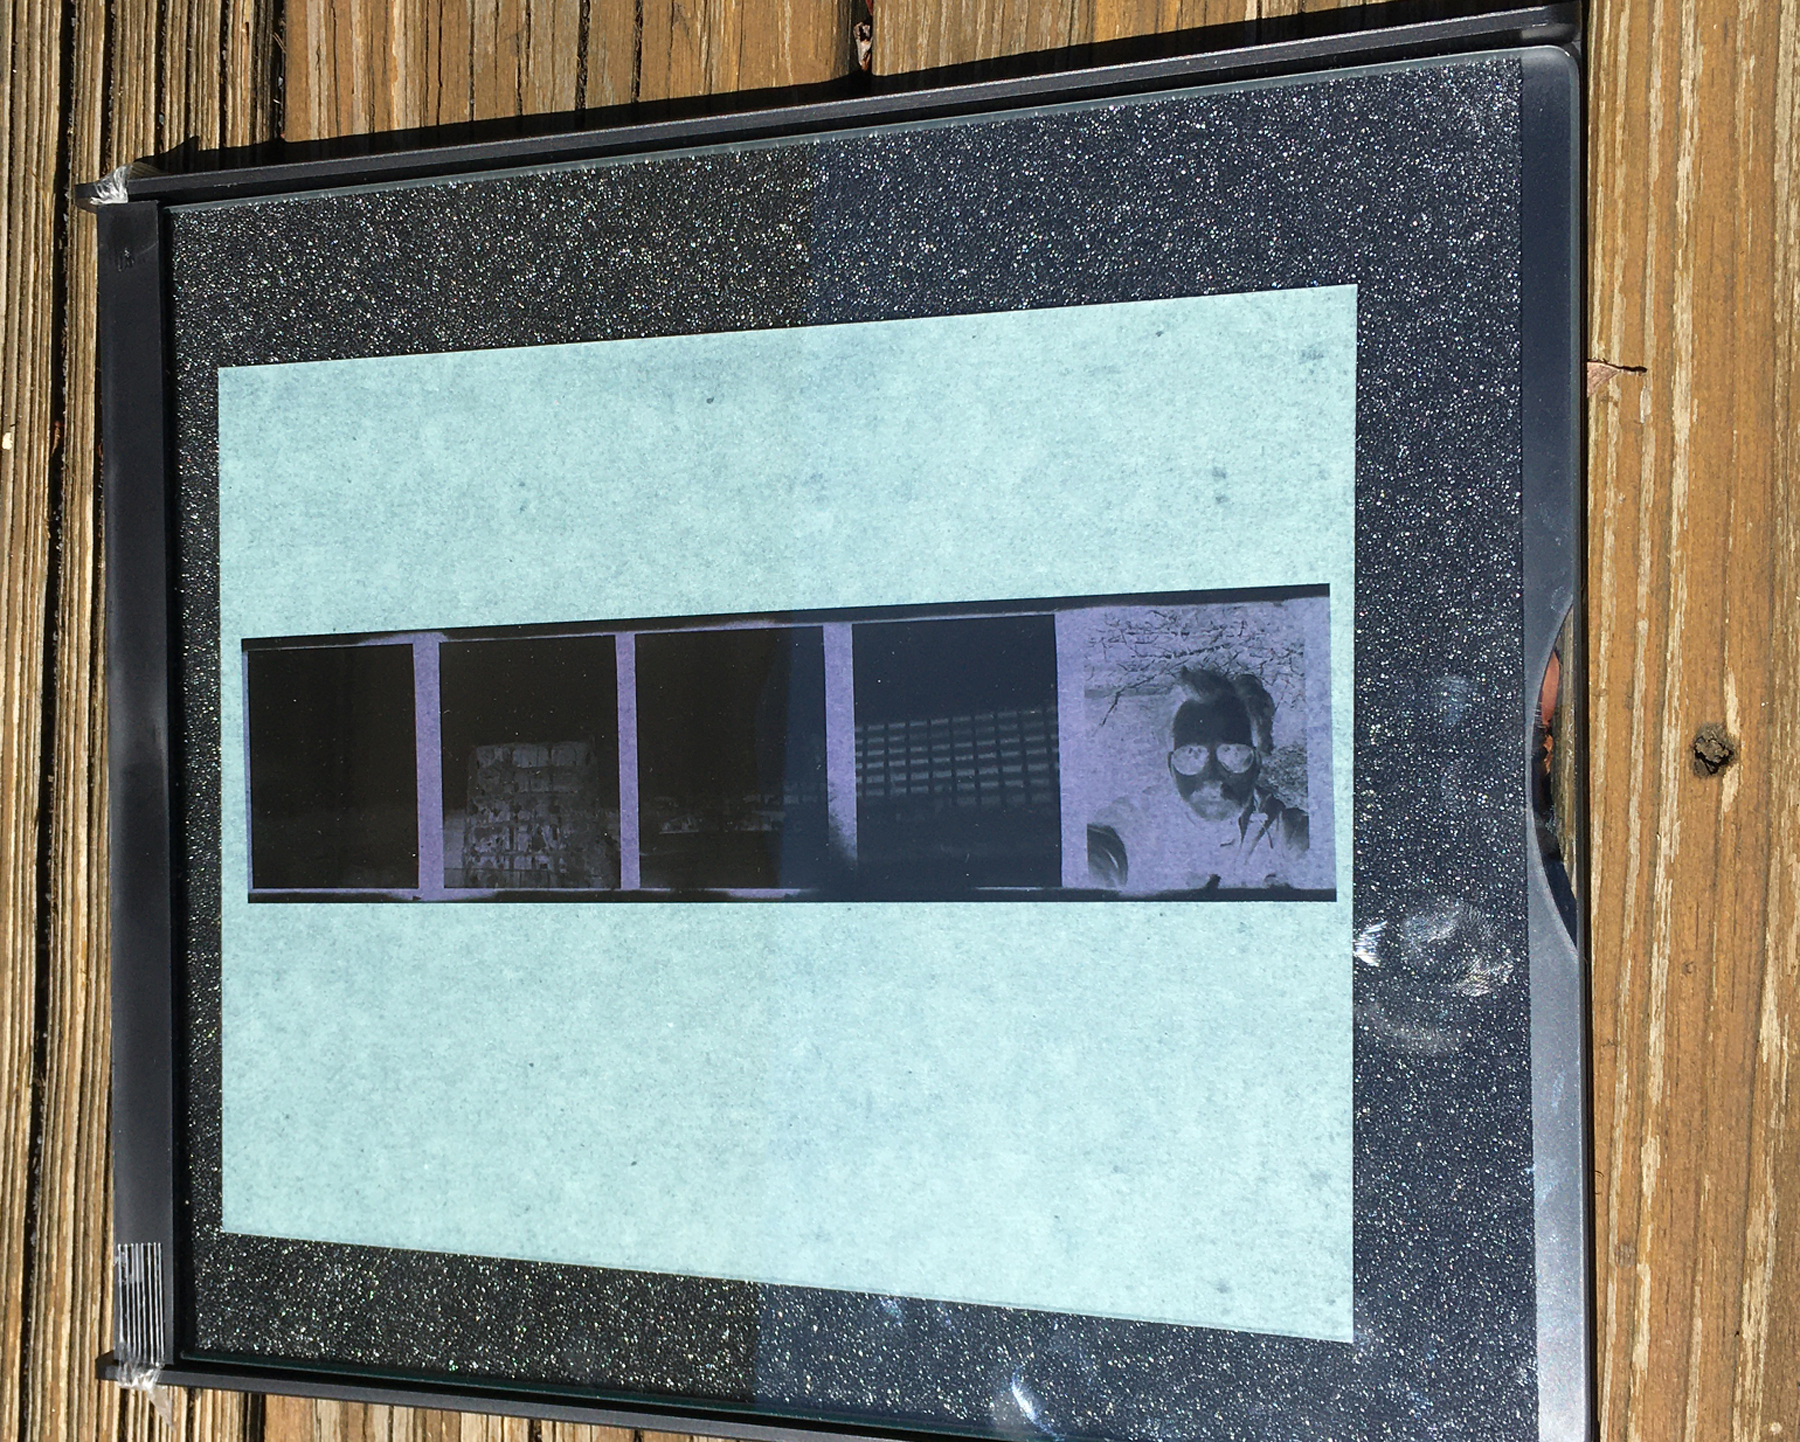
Fafnir Bearings Plant Demolition, 1994/2020. Contact printing frame of 120 negative, exposure time 20 minutes in direct sun. Photograph by James DaMico
An alternative to the sun is placing the coated paper and negative under a UV light. The chemical reaction of the ferric salt on the sensitized paper changed to ferrous salt when exposed to light and the ferrous salts then reacted to the ferricyanide resulting in the Prussian Blue color.
The Cyanotype is a contact print meaning that prior to the introduction of the photographic negative, they were primarily used to capture what was found in nature or really anything that you can place on the paper that will produce some interesting shapes. These are known as photograms or solargrams. For example, leaves can be placed on the sensitized paper, set out in the sun for a period of time and once ready, wash the paper in water. Exposure times vary so experimentation is key.

Nature Study. 2019. Photograph by James DaMico.
In my examples, I use pre-sensitized paper bought at my local art store. You can also purchase a kit of the dry chemical to mix and apply to your own paper or any natural surface. If using your own paper make sure it is of high quality and well sized. The sensitivity of the emulsion is too slow to be capable of placing in a camera thus photographers used the process to make contact prints.
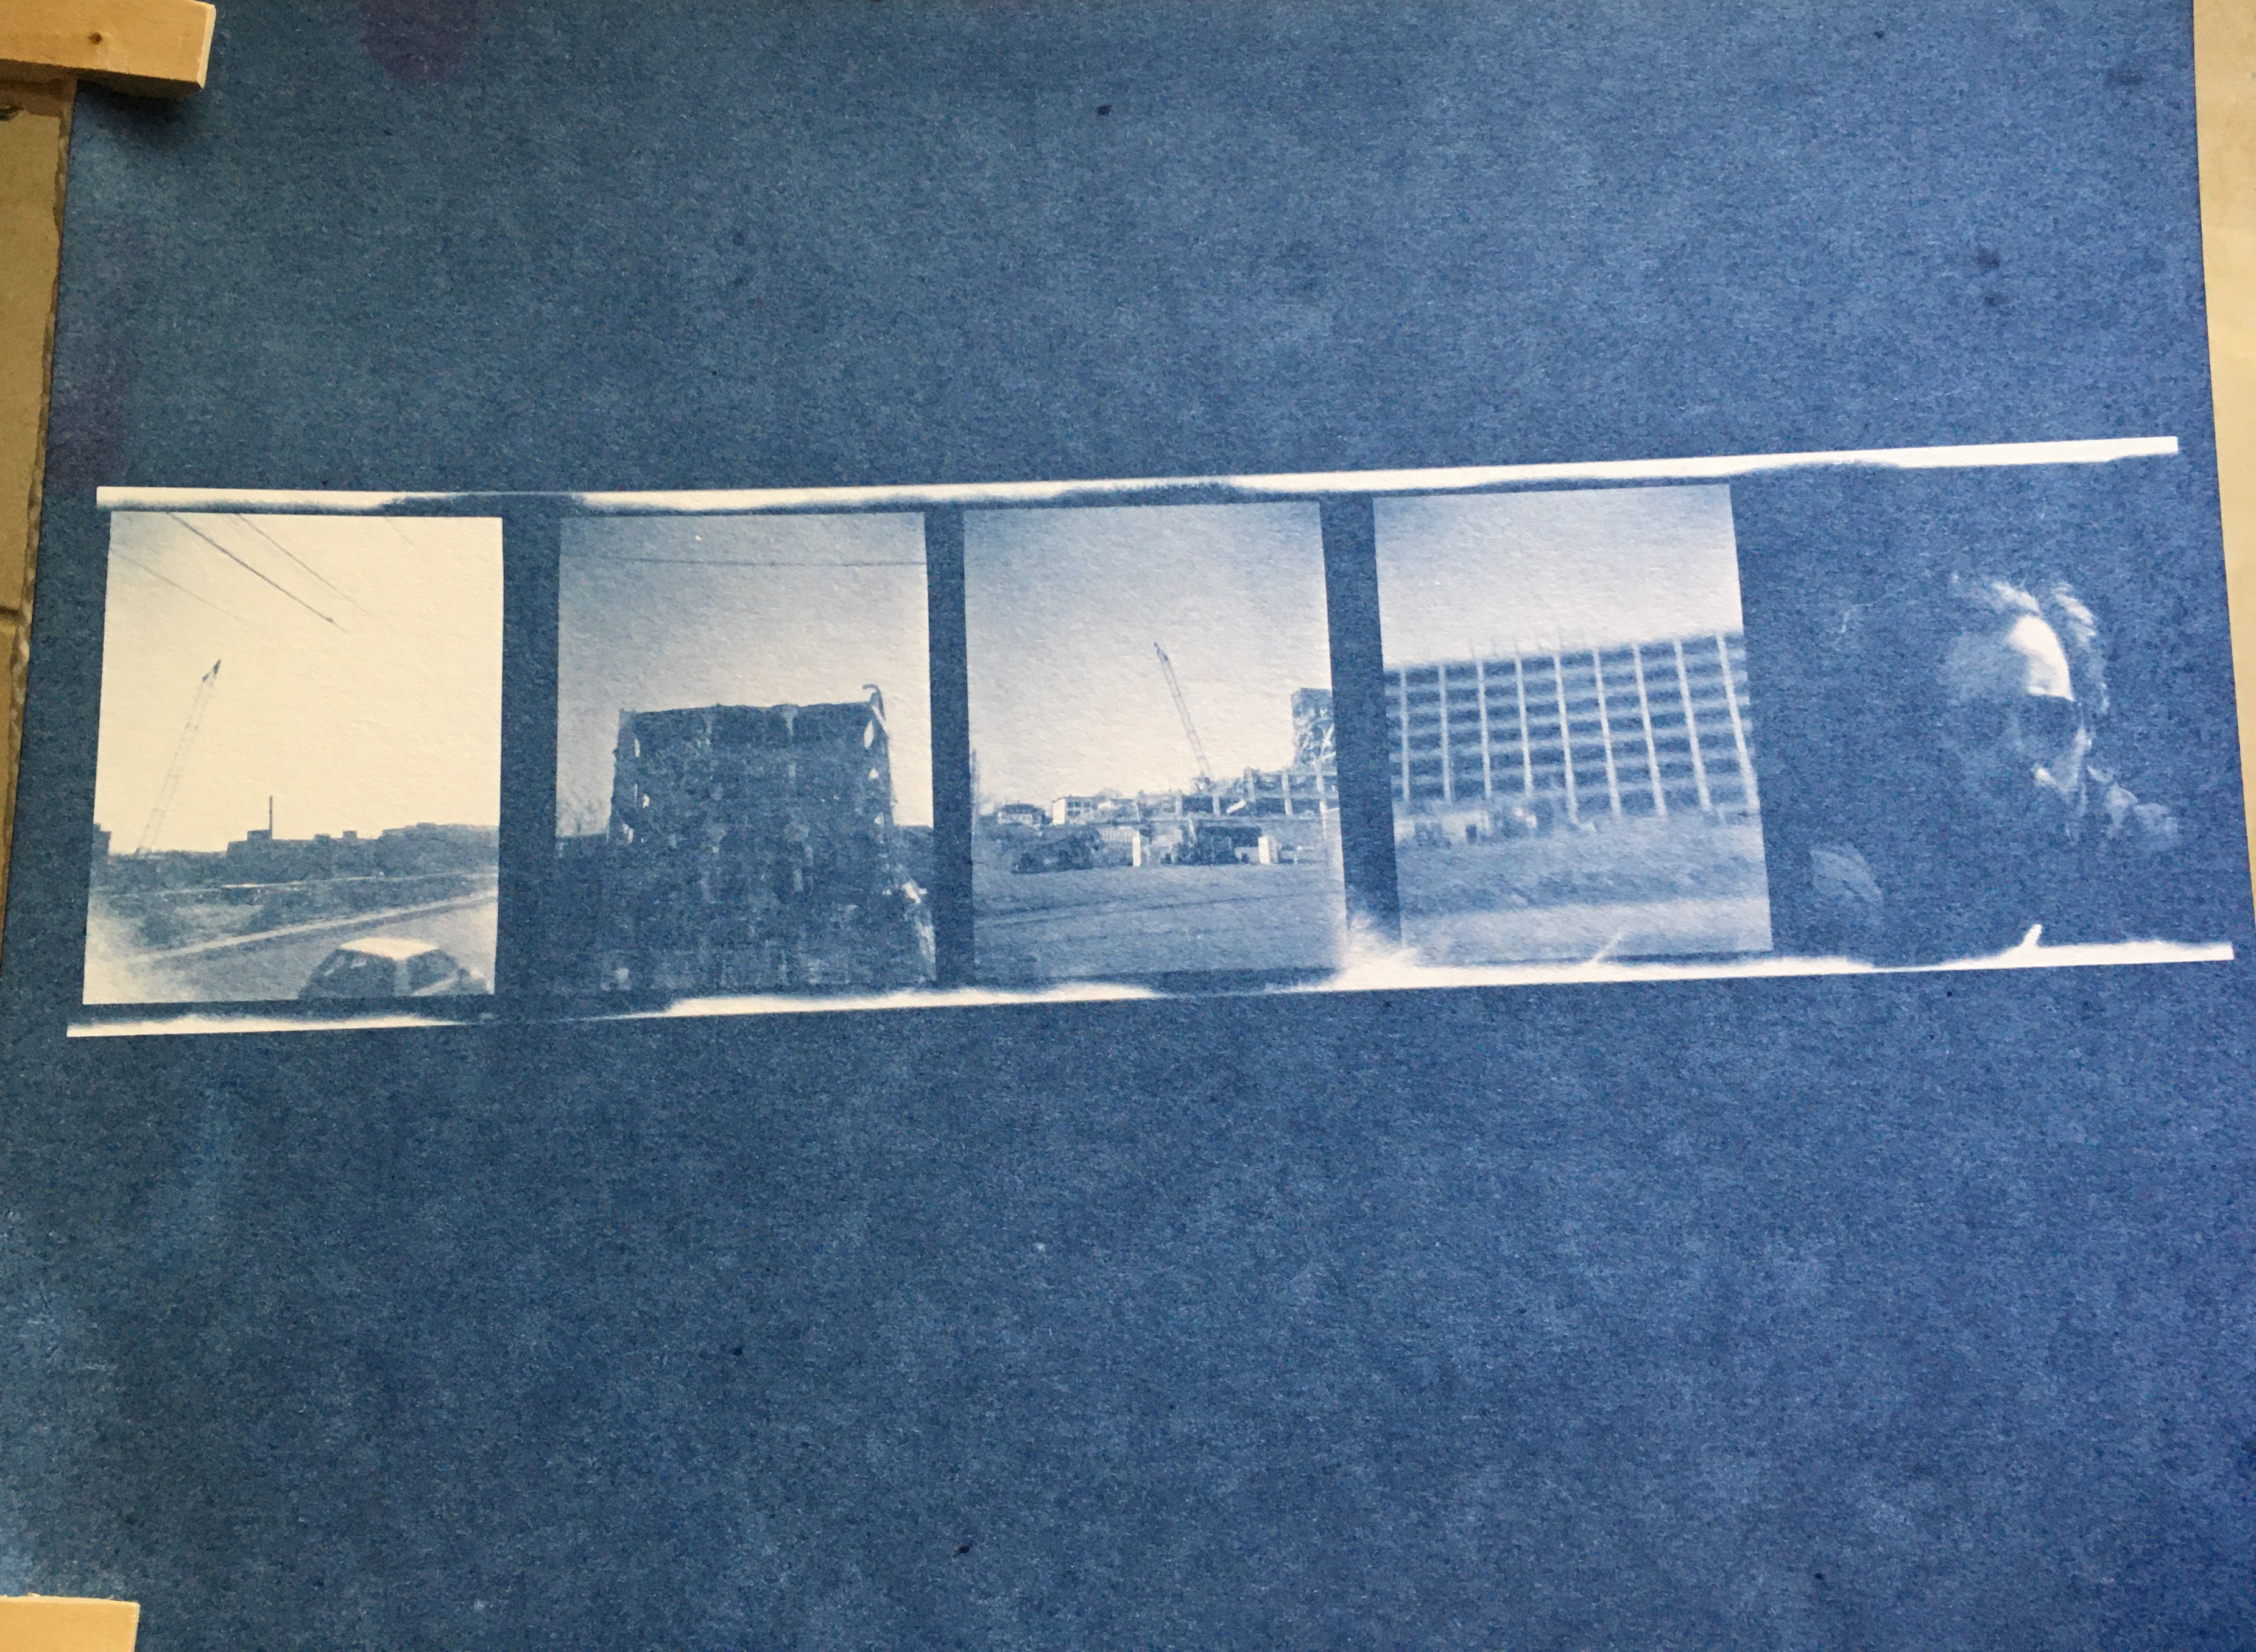
Fafnir Bearings Plant Demolition, 1994/2020. Final contact print of 120 negative. Photograph by James DaMico.
Preservation/Storage
The image in a Cyanotype print rests on or near the top layer of the paper with little to no emulsion. This makes the texture in the print very obvious and prone to surface abrasion thus do not try to clean a Cyanotype with a brush. In addition, Cyanotypes need to be protected from the light and kept in a low humidity environment. Ideal storage is using a buffered, four flap enclosure and an appropriate sized box that has passed the Photographic Activity Test (PAT). Four flap enclosures ensure that the image will not be at risk of abrasion due to handling.
For more information, please see these resources.
Resources:
Identification and history of photographic processes
Graphics Atlas: www.graphicsatlas.org
Created by the Image Permanence Institute at the Rochester Institute of Technology to teach people about all the historic photographic and print processes that have been developed over time. The tool allows you to look at the actual structure, through magnification and light sources, of a variety of processes as a way to help identify what you have in your collection.
Alternative Photography: www.alternativephotography.com
A good resource to learn about how to make images using historic photographic processes.
Eastman Museum: www.eastman.org
A great resource to learn about historic photographic processes virtually as well as in person through workshops.
Photograms: www.photograms.org
Gives a very thorough history written by Les Rudnick on early photography pioneers including inventors and photographers such as Anna Atkins.
Preservation Supplies
Gaylord Archival Supplies: www.gaylord.com
Conservation Resources International: www.conservationresources.com